 |
| Shot 1: Mid to long shot of a pigeon. This shot is an attempt to portray the grey, dull, almost boring surroundings; along with the innocent pigeon in the centre of the screen. |
 |
| Shot 2: Mid shot of rain dripping from a roof. This shot will be used in order to represent tears, e.g. Ella's tears. This suggests to the viewer that the mood of the scene is contrasting with the previous scene, and has become much more negative. This also means that we use pathetic fallacy by including this shot. |
 |
| Shot 3: Close up This shot is of tree branches swaying in the wind, to create a sense of calm for the viewer. |
 |
| Shot 4: Close up, panning. We will use this shot as many of the lockers are broken, subtly suggesting the idea of damage and lost security. |
 |
| Shot 5: Close up This shot shows a tap with water that is gradually running out. Suggesting to the viewer, once again, a connection to tears and emptiness. |
 |
| Shot 6: Mid shot, tilt. We have decided to use a tilt here as we want to track Ella's movement as she walks down the stairs; revealing first her body language and then her facial expression. |
 |
| Shot 7: Close up from the side/behind, panning. This shot is used again to track Ella's movement as she walks towards and out of the door. We pan from left to right, towards the door. |
 |
| Shot 8: Close up This is a close up of Ella's shoe as she steps in a puddle, with a splash. This shows the viewer that it has been raining (pathetic fallacy). |
 |
| Shot 9: Long shot A long shot is used here to show the surroundings as Ella walks away from the viewer. |
 |
| Shot 10: Close up through stairs. This shot is a more artistic one, showing Ella's feet from a different angle. This makes the scene more interesting to watch as there is no dialogue, just music and visuals. |
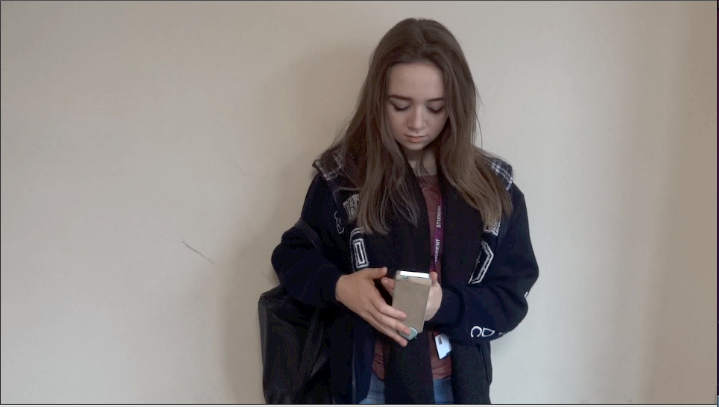 |
| Shot 11: Mid shot In this shot we see Ella get her phone out of her bag and look at it with a melancholy expression. With the use of a bid shot we are able to see her body language and facial expression clearly, helping us to understand her emotion. |
 |
| Shot 12: Over the shoulder shot, close up. Here we see that Ella is looking at a picture of a guy who we instantly assume is Johnathan (mentioned in the previous scene). |
 |
| Shot 13: Extreme close up We use a close up here to show Ella's sad expression in response to the image. This encourages the audience to sympathise with her. |
 |
| Shot 14: Mid to long shot Here the viewer sees Ella slide down the wall, falling to a sitting position. Her body crumbles due to her heartbreak. The end of the shot has more empty space in the composition than our subject. This is to suggest a feeling of bleak emptiness. |
 |
| Shot 15: Mid shot Ella puts the phone down beside her in this shot, implying that she is attempting to forget about Jonathan and move on. |
 |
| Shot 16: Long shot, through window of a door This shot will be used to introduce Marco into the scene again, as we see him walking near where Ella is sat. This encourages the viewer to see that he is about to come in and help Ella with her emotional struggle once again. |
 |
| Shot 17: Mid shot, panning, handheld For this shot we will track Marco's movement with a closer shot than the last. We will use a handheld camera here so that the viewer feels as if they are walking with him. |
 |
| Shot 18: Long shot, through window of door Here we see that Marco is about to walk through the door and find Ella sat on the floor. |
 |
| Shot 19: Mid shot, low angle This low angle shot is used to show Marco from Ella's point of view (from where she is sat on the floor). We see that he is surprised to see her like this as in the last scene she tells him that she is completely fine. |
 |
| Shot 20: Mid shot Here the audience sees Marco running over to Ella and hugging her, showing his concern. They continue to hug tightly, both sat against the wall. |
 |
| Shot 21: Close up This shot is used to show the facial expressions of both characters as Ella says simply '"I'm not okay". This is so we can see both Ella as she talks as well as Marco's response. At the end of the shot the two characters lean in to each other and the screen will fade to black. |


