Preliminary exercise:
This is a task that precedes your main task and is a chance for you to practise your skills without the pressure of it counting towards your final grade:Continuity task involving filming and editing a character opening a door, crossing a room and sitting down in a chair opposite another character, with whom she/he then exchanges a couple of lines of dialogue. This task should demonstrate match on action, shot/reverse shot and the 180-degree rule.
 |
| Shot 1: Mid shot, eye level. Marco is sat on a bench looking at his phone. I used a mid shot so the viewer can see the character's body language and a section of the surroundings, also this shot is close enough that the facial expression can be seen clearly too. |
 |
| Shot 2: Long shot Shows Ella walking up some steps. I used a long shot to show more of the surroundings so the viewer gains a clearer idea of where the characters are and what the context might be. |
 |
| Shot 3: Mid to long shot, low angle, match on action. Shows Ella's feet walking up steps in more detail, with a blurred view of Marco in the background. The use of match on action is for continuity and gives the audience a closer view of what is going on at that moment. I used a wider shot than a close up so the viewer can see Marco in the background in relation to Ella. |
 |
| Shot 4: Over the shoulder, long shot. Shows Ella walking again, but she has move closer. This once again shows the distance between the two characters and the surroundings to the viewer. |
 |
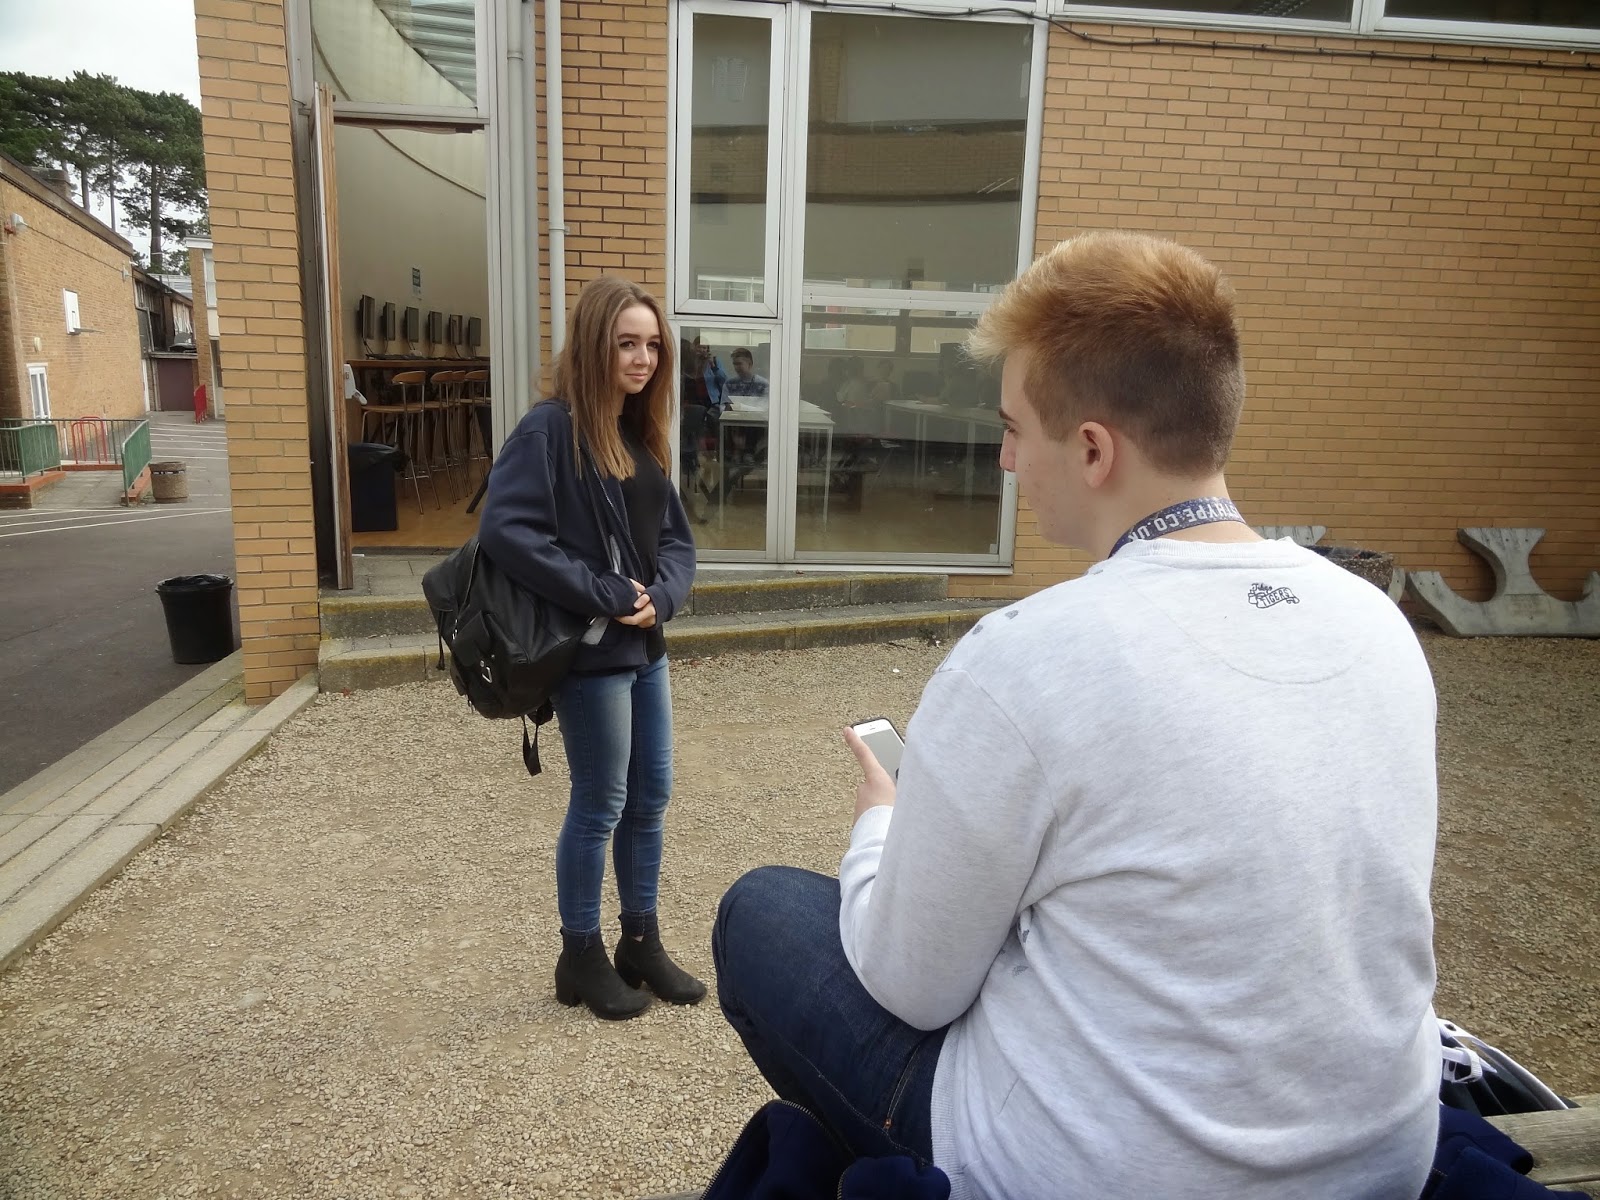
| Shot 5: Long shot Both characters face each other. I used a long shot here to show both of the characters (their body language, facial expression, position) clearly, presenting to the viewer that Ella has moved even closer. |
 |
| Shot 6: Over the shoulder, mid shot. Shows Marco's back and Ella in the background. I used an over the shoulder shot so that the viewer can see Ella's movement but not Marco's reaction to it. This creates a feeling of suspense as the viewer is not sure whether this encounter will be positive or negative. |
 |
| Shot 7: Close up, match on action. Shows Marco standing up from sitting position. This shot was used as a visual bridge for the audience; they can see the movement but once again Marco's response to Ella's arrival is hidden, creating further tension. |
 |
| Shot 8: Long shot Shows Marco reaching out to hug Ella. This shot was used to clearly show the complete body language of both characters so the audience are now aware that Marco has a positive response to Ella's arrival. |
 |
| Shot 9: Long shot Shows Ella and Marco hugging tightly. This shot is a continuation of the last shot with more action. It shows the two characters in a tight embrace suggesting to the viewer that they are good friends. This removes all the tension that was previously built up and puts the viewer at ease again. |
 |
| Shot 10: Extreme close up, eye level, match on action. Shows Ella and Marco hugging in more detail. The use of a close up here gives the viewer a closer look at the action and means they are able to see Ella's facial expression (her reaction to the hug). |
 |
| Shot 11: Long shot Shows Marco leading Ella to a seat, from behind. I used a long shot so that a space could be left to the left side of the shot, suggesting to the viewer that the characters are about to move into that space. This means the viewer feels more in control of what is happening in the scene and can relax into the more steady pace. |
 |
| Shot 12: Mid to long shot Showing both characters gradually sitting down. This shot shows the audience a different view of the surrounding the characters are in whilst ensuring not to restrict the view of the characters. |
 |
| Shot 13: Mid shot Shows the two characters sat opposite each other having a conversation. The use of a mid shot here shows the viewer the characters' body language and facial expressions clearly. This could not be achieved by using a close up as the viewer would not be able to see both characters at the same time. |
 |
| Shot 14: Close up, birds eye, canted. Shows both characters' hand gestures. This close up shot was used so the viewer can see how the characters are responding to each other simply by body language. The canted birds eye view is an interesting shot as it is not often used, especially the combination of birds eye with close up. |
 |
| Shot 15: Over the shoulder, mid shot, sot reverse shot. Shows Ella over Marco's shoulder. I used an over the shoulder mid shot here so the viewer can see Ella's facial expression whilst she is talking/responding to what Marco is saying. This was more effective than a close up as the viewer is able to see her body language and surroundings as well as face; whilst sticking to the 180 degree rule. |
 |
| Shot 16: Bird's eye, mid shot. Shows both characters still engaged in conversation. This shot enables the viewer to see the emotional closeness between the characters that is building up throughout the scene. This encourages them to question how their relationship may develop as the scene continues. |
 |
| Shot 17: Over the shoulder, mid shot, shot reverse shot. Shows Marco over Ella's shoulder. I chose this shot so the audience can see Marco's facial expression whilst he is talking/responding. We could not shoot this from over Ella's other shoulder as it would break the 180 degree rule; unless we showed the movement to the other side. |
 |
| Shot 18: Extreme close up Showing Ella's hand. I chose a close up so the moment featured in this shot and the next could have more of an emotional impact, as it only shows the hand gestures and no facial expressions or body language as a visual aid to explain the characters' emotions to the viewer. There is also empty space to the right suggesting that something will enter into it. |
 |
| Shot 19: Extreme close up Marco reaches out to touch Ella's hand. This shot is a continuation of shot 18. Marco's hand moves into the previously empty space to hold onto Ella's. This is an attempt to evoke emotion from the audience as it suggests that Ella needs support during a tough time. |
 |
| Shot 20: Extreme close up Shows Ella's response to action. I used an extreme close up here so the viewer can clearly see just Ella's facial expression - how she has responded to Marco's reaching out to her. This enables the viewer to see more detail of the face and connect with the character more. |
 |
| Shot 21: Extreme close up Shows Marco's response to Ella's facial expression. The use of a close up here means the audience can see the character's facial expression really clearly in great detail. This gives them a clear understanding of the relationship between the two characters. |
 |
| Shot 22 and 23: Close up Ella grabs her bag ready to leave. The use of just close ups for shots 22 and 23 increase the pace of the scene and encourage the viewer to concentrate more on the action.  |
 |
| Shot 24: Mid to long shot Shows both characters getting up about to leave. The use of a mid to long shot here means that the viewer can clearly see the movement of both characters at the same time. |
 |
| Shot 25: Long shot Showing them walking away. This shot was used to show the body language of the two characters as they walk away from and to show the distance between them and the table now. |
 |
| Shot 26: Long shot Showing them continuing to walk away. I used a long shot for this shot as the viewer can once again see the distance now between them and the table. |
 |
| Shot 27: Close up, match on action. Shows the feet of the two characters. A close up was used here to match the action in a more detailed from to what was going on in the scene in the wider shot. This is used for continuity and will help make the viewer less aware of the editing. |
 |
| Shot 28 and 29: Extreme long shot Showing the two characters beginning to walk around the corner. This shot was used to show that the characters are now at a great distance from us as the viewers, and the surroundings for a final time |